


Quick, efficient field dressing yields the highest-quality meat. The process is often more intimidating with elk than deer because of elk’s size.
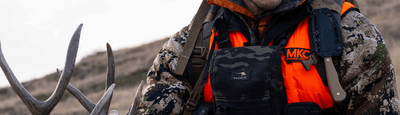
My name is John Dudley. I’m a decorated archer and big game bowhunter. Let me teach you how to field dress an elk just like the pros using the gutting method.
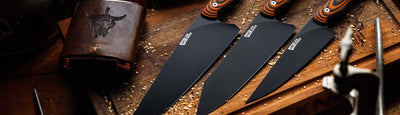
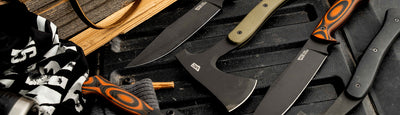
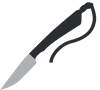
I’ll use Montana Knife Company’s Triumph Hunter XL throughout this process. It’s an all-purpose processing knife that skins, guts, and debones any big game.

How to Field Dress an Elk
Step 1: Skinning
You have to learn how to skin an elk before you learn how to field dress an elk.
Start by positioning the elk on its back. It might help to prop the elk against a tree or log to keep it from rolling over. Rocks and large sticks help if there aren’t any trees nearby.
I can’t overemphasize the importance of careful knife use. Always cut away from your body, and keep a first-aid kit with you on every hunt.
Before you begin, prepare a clean, contaminant-free area to section out your meat. A good tarp keeps your meat and tools out of the dirt.
I usually have buddies with me who can hold the elk’s legs apart to make skinning easy. If you don’t have someone to help, bring rope with you. Use it to tie your elk’s legs to trees, holding them apart. In the absence of trees, tent stakes also make good anchors.
Start by cutting north from the anus with your elk skinning knife. Cut up the center line of the belly until you reach the sternum. Be sure to leave proof of sex on at least one-quarter of the animal if your area’s hunting laws require it.
Once you’ve finished the center line, use gentle knife strokes to separate the hide from the meat. Continue the skinning process along each front leg, following the bone. Make a circle cut around each knee and cut the hide off at that point.
For the rear legs, start at the knee and cut a line from the center to the genitals. Once you’ve finished the legs, entirely remove the hide. Roll the hide (skin side in, fur side out) as you cut it away — this keeps it clean and pristine. Cut the hide down to the spine on both sides of the elk.
If you plan to keep the head as a trophy, take extra care when cutting around the neck.
Step 2: Quartering
During this step, unroll the hide to create a clean working surface.
We’ll start at the hind end. Cut down to the pelvic bone between the hind legs. Avoid cutting into the abdominal muscles.
Next, with one hind leg pulled away from the elk, slice along the pelvic bone until you find the hip socket and carefully cut around the ball joint. Keep the knife flat against the pelvis as you cut — follow its contour.
Continue to cut the hind quarter away from the pelvis, remembering to double back. Once the quarter is free, remove it and place it on the tarp you prepared earlier.
Next, return to the front of the animal. Slice along the ribcage on the front quarter, carefully following it until you sever the leg from the body. Cut between the ribcage and the shoulder blade.
Repeat the same process for the other two quarters. Slice the remaining hide off the spine as you turn the animal over.
If you want to harvest the neck meat, extend your front quarters into the neck. The neck meat makes a fantastic roast or pulled “pork.” You can also add it to your ground elk meat.
Step 3: Backstraps
Backstraps are easy to harvest and one of the most sought-after venison cuts. To remove the backstraps, dive in with your knife on one side of the spine around the shoulder area.
Cut down along the spine until you reach the pelvis. Extend the cut up the neck to remove any remaining meat, then cut along the ribcage to free it. Repeat on the other side to remove the other backstrap.

Step 4: Harvest the Tenderloins
The safest way to access the elk’s tenderloins is to gut the animal first.
Carefully cut through the muscle of the elk’s belly. Start at the sternum when you’re ready to minimize the chance that you’ll poke the intestines or stomach.
Cut until you have enough space to fit your hand inside the abdomen. Then, use one hand to slice south while using your free hand to push the guts out of the way.
Once you’ve cut through the ribcage and removed the guts, you can access the tenderloin easily. It’ll be adjacent to the ribs and spine. Use your knife to cut along the spine, using the bones as your guide.
Step 5: Harvest the Ribs
Many hunters skip harvesting the ribcage. Ribcages are hard to transport, and the meat you get for the hassle is small. However, I encourage you to try it for sustainability reasons and because the ribs have a depth of flavor.
After gutting the animal, use your knife or saw to cut through the ribs where they connect with the spine. Keep your fingers safely out of the way during this process.
Ribcages don’t keep for very long. They’re full of fat that’s nearly impossible to trim off, causing them to spoil sooner. The best solution is to cook them right at camp, along with other cuts that spoil quickly. They cook deliciously on a grill or smoker.
Step 6: Harvest the Organ Meats
Since elk are massive animals, it goes without saying that their organs are also substantial. Organ meat can be divisive, even among hunters, but it’s just as delicious as the more sought-after cuts. It’s also full of essential vitamins and nutrients.
The heart and lungs sit inside an elk’s chest cavity, protected by the diaphragm. If you decide to harvest the ribs, you’ll remove them along the way. Heart, liver, and tongue are some of the most delicious organ meats.
Tongue
To harvest the elk tongue, open the animal’s mouth and pull the tongue out firmly. Use your knife to cut the back edge until it pulls free. The tongue has a tough layer of outer skin that you’ll have to remove before eating, but the meat inside is tender and flavorful.
Heart
After removing the elk’s lungs, you may harvest the heart. Pull it out and cut any connected veins and arteries. Once you have access to water, clean it thoroughly and remove as much blood as possible.
Liver
Elk liver makes a nutritious meal. You’ll find the liver inside the abdominal cavity alongside the stomach and intestines. Take care not to puncture the guts as you harvest it.
Always inspect the organs you harvest for abnormalities. Elk occasionally carry liver flukes, a parasite often found in whitetail deer. A healthy elk liver is smooth and dark red, while an unhealthy liver may be pale or covered in lesions or cysts.
Bonus Step: Pack It Out
Field dressing your elk is only half the battle. Elk offers hundreds of pounds of meat for you to enjoy, but carrying all that meat is a chore if your camp or vehicle isn’t nearby.
If you’re like me and prefer to hunt with friends, it’s easy to divide the meat among multiple people. However, if you’re alone, you may have to make multiple trips.
One way to reduce weight is by boning out your elk. While this extends the time you spend field dressing, it may reduce your number of trips.
After field dressing your elk, dry and cool the meat. To help with this process, use high-quality game bags or a pack made for packing out meat. The sooner you get your meat to a cool, dry place, the fresher it’ll taste.
Protect Your Harvest (and Yourself)
Knowing how to field dress an elk is useless if an undetected predator steals your harvest from under your nose.
The smell of a fresh carcass attracts bears and other predators. You don’t want to compete with those animals to retrieve the rest of your harvest. Attracting those predators threatens your safety, too.
So, stay aware of your surroundings as much as possible and keep bear spray within easy reach. Your life is more important than any trophy. If you need to make multiple trips back to camp, tie your remaining meat up in a tree in game bags where predators can’t reach.
Finally, if you need to take multiple trips, pack out your meat first and your trophy second. Retrieving as much meat as possible is part and parcel of honoring the life you’ve taken.
My Final Thoughts on Field Dressing Elk
Now that you’ve learned how to field dress an elk, make sure you have a cooler to keep the meat fresh on your way home. And when you’re ready to prepare your food, don’t forget to practice safe cooking techniques: always cook your meat to a safe internal temperature and avoid cross-contamination between raw and cooked meats.
Happy hunting!
with John Dudley, Decorated Professional Archer and Founder of Nock On Archery