


When I think of field dressing a black bear, I’m reminded of one of my favorite hunts my son and I went on together. When he was only 12 years old, he took down a bear with his rifle using the “spot and stalk” method.
Bears are dangerous, and getting within range of one is a challenge. I’m proud of my son for his accomplishment, and I’m even prouder of how we field-dressed the black bear together.
Skinning and field dressing a black bear is a chore. It takes time, precision, concentration, and practice, but arming yourself with knowledge makes the task easier. We’ll teach you how to field dress a black bear below.

What to Know When Field Dressing a Bear
Field dressing a black bear differs from field dressing other game. Even if you have plenty of experience with deer and other herbivores, a bear is a whole other animal (literally). We’ll focus on how to skin a black bear here, but the following tips also apply to brown bears.
The paws are a bear’s most distinguishing feature, and they must stay on the hide. If you’re a beginner, do not skin out the paws yourself. Your taxidermist will thank you.
Once you’ve bagged your bear, skin it as soon as possible. The sooner you remove the hide, the faster the carcass will dissipate heat. Meat that stays hot for too long can spoil.
Note that in some areas, you must leave proof of sex on at least one quarter of the animal. Consider researching your state’s requirements before you head out on the hunt.
As you skin, try to preserve the hide as best you can. Avoid poking holes in it, and ensure it’s clean before delivering it to the taxidermist. The better the condition it’s in, the better the result will be.
Game bags are crucial for keeping meat clean and organized, so be sure to have some on hand. Before you begin field dressing your black bear, clear your surroundings and drag the bear to the cleanest spot. Try to keep dirt and debris off the hide. Pine needles, leaves, and grass work well to keep your area clean. You may find it helpful to bring a tarp to prepare a clean, debris-free area.
If you don’t have game bags, open garbage bags also work in a pinch. If it’s hot, move the bear to a shaded area to keep the hide and carcass cooler. Both meat and hides last longest when kept clean, cool, and dry.
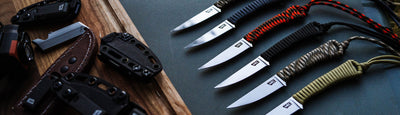
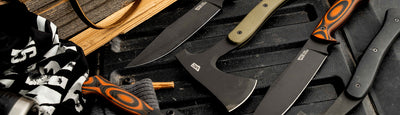
Along with game and garbage bags, a reliable fixed-blade knife is a must-have. A length of paracord comes in handy, too, especially if you’re on your own and need to secure a leg while field dressing a black bear.
Keep in mind that an improperly preserved bear hide will slip or lose its hair quickly. Thoroughly fleshing and salting the hide after removing it will preserve it, especially in warm weather.
Preserving Your Bear Hide
There are two ways to preserve your black bear hide for later use: freezing and salting. Both methods start by fleshing the hide (removing any remaining fat or flesh). Note that you can’t freeze a hide after salting it, but you can freeze it, thaw it, and then salt it later.
To flesh your hide, lay it over a smooth surface, such as a log or your leg, and use a sharp knife to shave away the remaining flesh. You may nick the hide during this step, but a perfect hide gets easier with practice.
Freezing a hide is easy — just stick it in your freezer. Try to lay it flat if you have freezer space. Again, bear hides are fantastic insulators, so a rolled-up hide may keep the inner portions too warm and allow them to spoil. You can roll the hide up after it’s cooled down nearly to freezing.
To salt a hide, spread it out flesh-side up, then spread salt over it. Focus extra salt on the thickest areas, such as the paws and face, while maintaining an even layer overall. Cover it with a tarp afterward to keep it dry and protected from the elements.
How to Skin a Black Bear Step by Step
Let’s get to the meat of this guide (pun intended). Below, you’ll find directions on how to field dress a black bear via the gut method. The gutless method also works well with bears.
Here’s how to field dress a black bear via the gut method:
- Lay the bear on its back with its legs spread in a “starfish” position.
- With the bear situated, make a center cut from the anus straight through the bear’s belly to the base of its neck. Be careful not to puncture the guts; use a gut hook if necessary.
- Remove the internal organs from the bear. You may find it helpful to lay the bear on its side so gravity can assist. Cut through the diaphragm and into the chest cavity to remove the heart and lungs.
- On the inside of the bear’s front legs, make a cut from the wrist joint up to the armpit area. Angle up and forward into the center of the sternum.
- On the inside of its back legs, cut from the ankle joint to the centerline cut you made in step two.
- Skin out the front and back quarters. Start on one side of the bear, move to the other, and put each quarter in a game bag once it’s done.
- While skinning the legs, cut the ankle joint just above the foot to keep each paw attached to the hide. Then, remove the skin from that leg with the paw still attached. Always keep the paws attached when skinning a bear for a rug or other taxidermy.
- Skin the hide away from the rest of the carcass, being careful to keep dirt off the hide.
- Finally, cut through the neck at the base of the skull and remove the head from the carcass. You may wish to carefully peel the skull away from the hide, but some hunters leave it in place for their taxidermist to take care of.
Common Mistakes to Avoid When Field Dressing a Black Bear
When you’re field dressing your black bear, resist the temptation to skin the head and paws separately. I can’t emphasize enough that they must stay attached to the hide.
Refrain from folding or rolling the meat and hide before they completely cool. Bear hair is a great insulator; it’ll spoil the meat on the inside and make hair fall out of the hide.
Don’t leave too much fat on the hide while field dressing your black bear. Removing as much fat as possible reduces packing weight, and it cuts down on the amount of fleshing later, too.
However, don’t compromise your hide’s quality in the name of removing every last bit of fat. An intact, nick-free hide is more important than cutting every bit of fat away.
The post-field-dressing process is simple: Cool the black bear down, then get the hide to your taxidermist as soon as possible. Freezing or storing the meat in a cooler or on ice keeps it in optimal condition.
If you plan to keep the hide for taxidermy, avoid storing it in a plastic bag. Game and burlap bags keep the hide clean and dry and keep flies away. However, plastic bags retain too much moisture. A hide that can’t breathe deteriorates quickly.
Finally, remember that time is of the essence in the field, whether you’re just collecting meat or you’re looking for a trophy. A taxidermist can only work with the raw materials you give them, and a low-quality hide will result in a low-quality mount.
How to Field Dress a Black Bear: Final Thoughts
Learning to field dress a black bear takes time and repetition. I’ve definitely improved my process since I became a master bladesmith years ago. Even if you’ve been field dressing your game for years, we encourage you to save this post as a helpful reference.

by Josh Smith, Master Bladesmith and Founder of Montana Knife Company